For the love of all things strawberries and tennis, celebrate this year’s Wimbledon Grandslam with the treats to match. From delicious cheesecake shots to yummy Tennis ball truffles, these delights will be a smash hit!
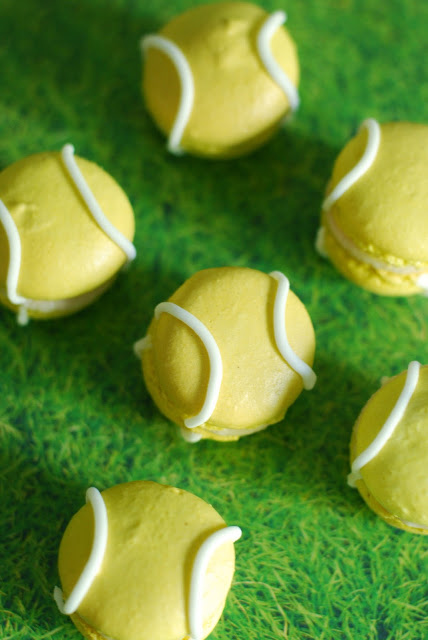
1. Nakd Pistachio “Tennis Ball” Truffles

Recipe sourced from
|
Ingredients:
|
Method:
- Cut the Nakd bars into halves and roll each half into a ball. Rinse your hands with cold water before you begin to make it easier. Leave the balls in the fridge whilst you prepare the coating.
- In a food processor or coffee grinder, grind the pistachios and turmeric together until you get a fine green-yellow powder. You may need to add more turmeric to achieve the classic Tennis ball colour but don’t worry – you won’t be able to taste the turmeric!
- Add the agave to a small bowl and dip the Nakd bar balls into the agave to cover before dipping into the pistachio powder, rolling it around to fully coat.
- Place on a plate in the fridge to fully set.
- If you wish, use some white icing to create the tennis ball lines. These truffles keep for 3 days in the fridge.
|
2. Strawberry No-Bake Cheesecake Shots
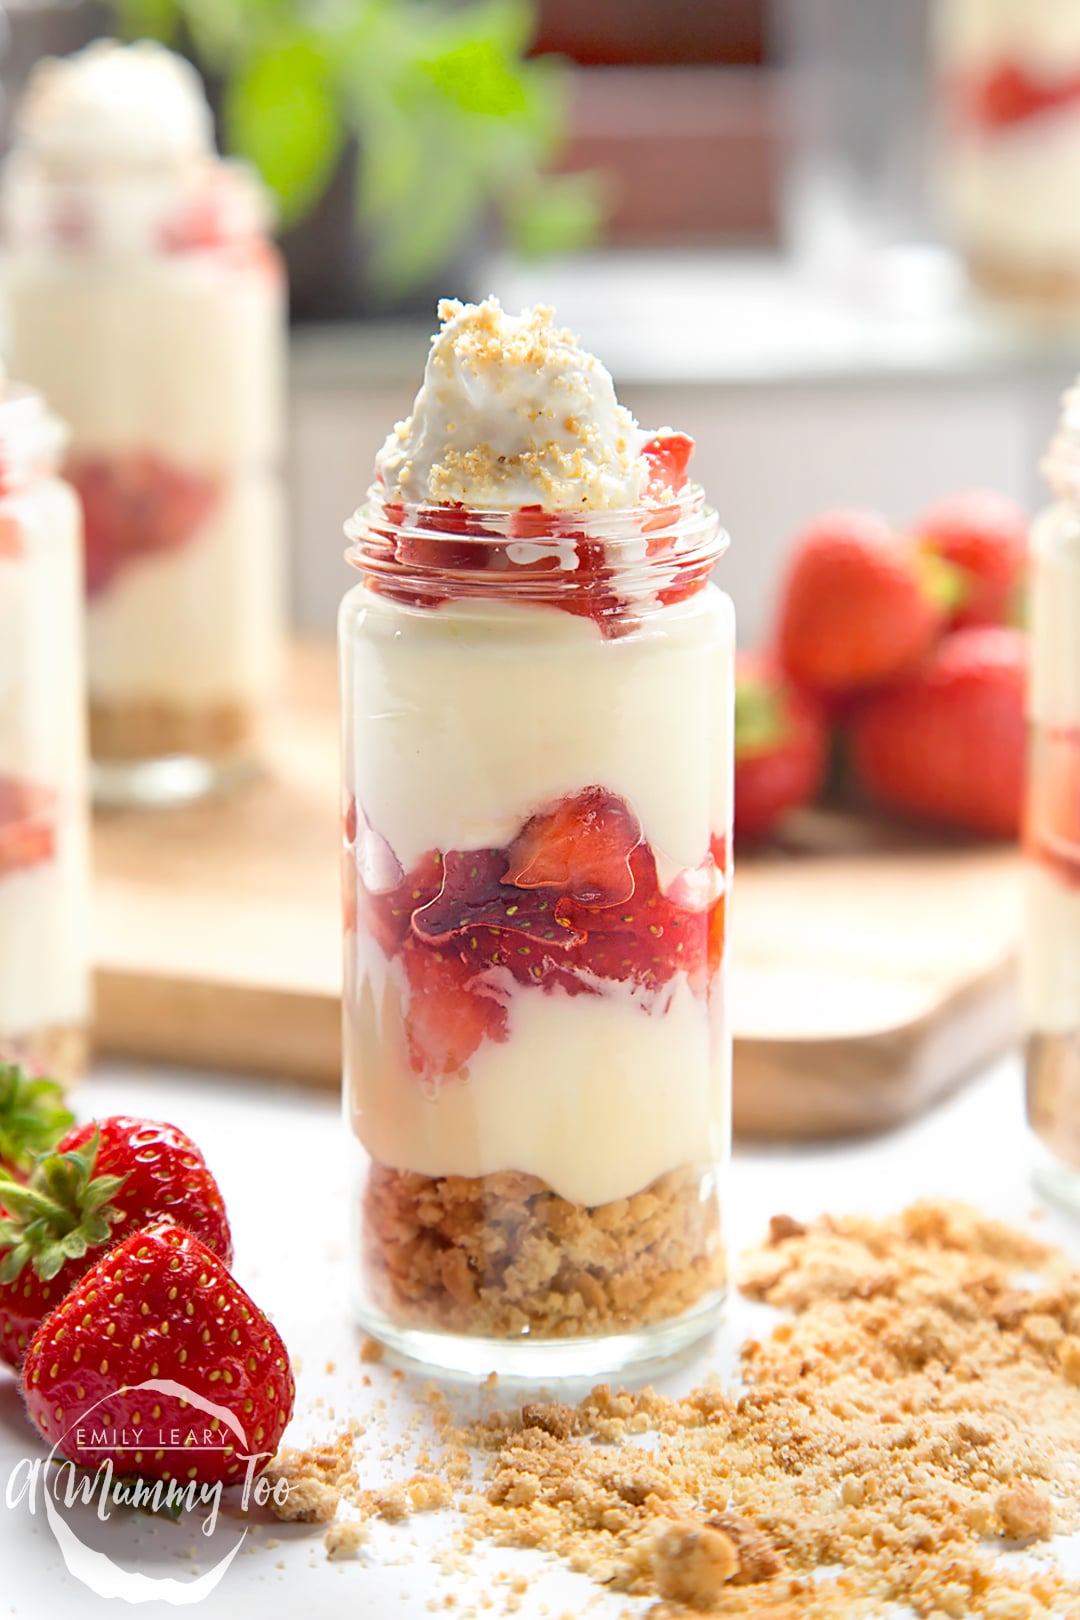
*Recipe sourced from A Mummy Too
| Ingredients:
For the base:
For the cheesecake filling:
- 150ml double cream
- 280g cream cheese
- 1/2 tsp vanilla
- 50g icing (powdered) sugar, sifted
- 100g white chocolate, melted
- 300g strawberries
For the topping:
|
Method:
- Put the biscuits into a double-lined freezer bag and crush with a rolling pin until it resembles coarse sand with a few larger lumps – don’t overdo it!
- In a bowl, whisk the cream cheese, cream and vanilla until thick.
- Add the sugar and whisk again.
- Melt the white chocolate, allow to cool to room temp, then add to the cheesecake mix and beat briefly to combine.
- Take your jars and using a teaspoon sprinkle in a layer of loose biscuit around 2 cm high
- Pipe the cheesecake mixture into each jar, up to about half way.
- Chop the strawberries into small pieces and drop a generous layer into each jar.
- Pipe the remaining cheesecake filling into each jar, stopping 1cm shy of the top.
- Pile on the remaining chopped strawberries.
- Finish each jar with a swirl of squirty cream.
|
3. Wimbledon Cake
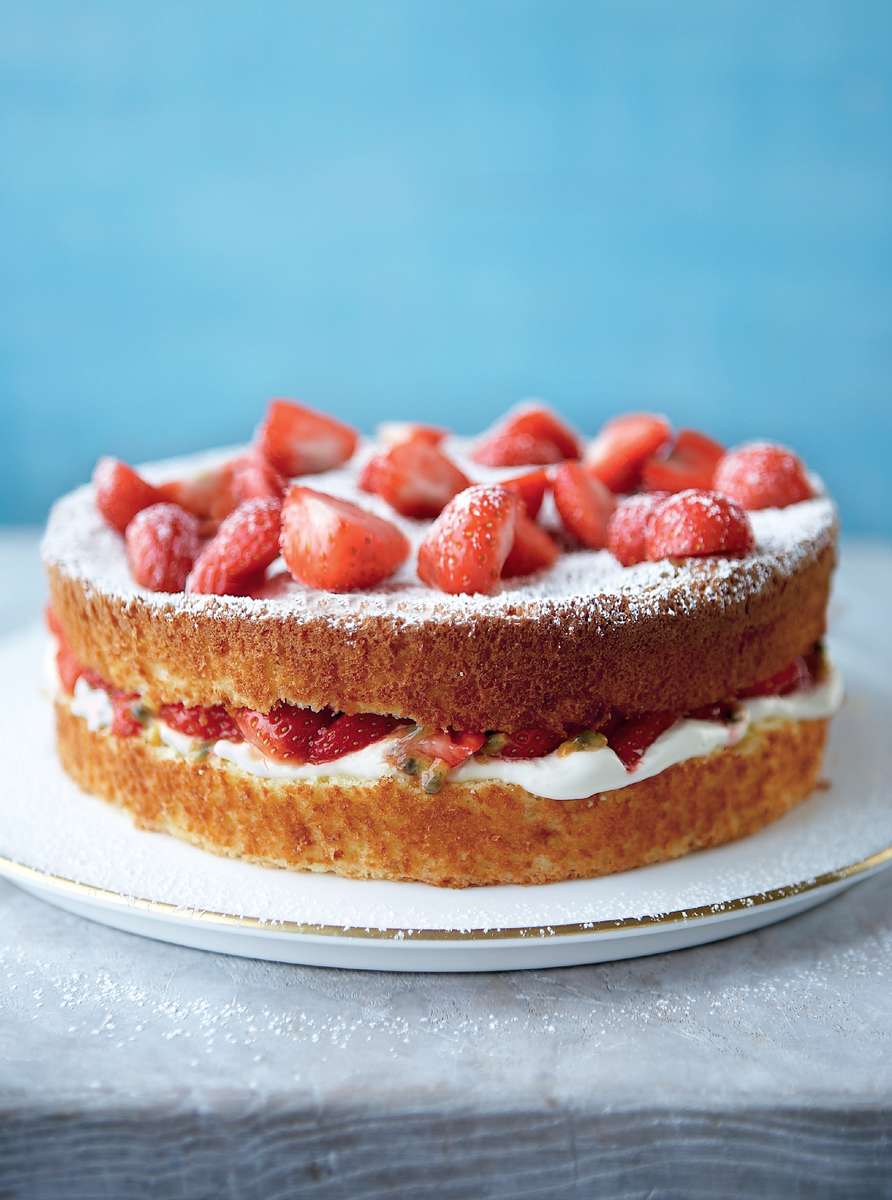
*Recipe sourced from The Happy Foodie
Ingredients:
- 3 large eggs, separated
- Grated rind and juice of 1 orange
- 75g (3 oz) Semolina
Filling and topping:
- 100g (4oz) strawberries
- 1 Passion fruit
- 150ml (1/2 pint) whipping or double cream, whipped
- Icing sugar to finish
|
Method:
- Pre-heat the oven to 180°C/Fan 160°C/Gas 4. Grease a 20cm (8in) deep round cake tin then line the base with baking parchment.
- Measure the egg yolks, sugar, grated orange rind and juice and the semolina into a bowl and beat until thoroughly blended. In a separate clean bowl, whisk the egg whites until they are stiff but not dry, then gently fold into the orange and semolina mixture. Turn into the prepared tin.
- Bake in the pre-heated oven for about 30-35 minutes or until well risen and the top of the cake springs back when lightly pressed with a finger. Leave to cool in the tin for a few minutes then turn out, peel off the parchment and finish cooling on a wire rack.
- Reserve a few strawberries to decorate the top of the cake, then slice the remainder. Halve the passion fruit and scoop out the pulp. To fill the cake, cut it in half horizontally and sandwich the slices together with the sliced strawberries, passion fruit pulp, and whipped cream. Just before serving, decorate with the reserved strawberries, sliced or left whole, and sieve some icing sugar over the top.
|
4. Strawberry and Pimm’s Jam

*Recipe sourced from The Happy Foodie
| Ingredients:
2kg Strawberries
40ml water
80ml lemon juice (juice of about 11/2 lemons)
1kg jam sugar
150ml Pimm’s |
Method:
- Halve the strawberries, place in a large jam pan with the water and soften for 10–15 minutes on a moderate heat.
- Add the lemon juice and jam sugar, stirring to dissolve the sugar while bringing the mixture to the boil. Continue to boil steadily at around 104°C, stirring intermittently, for another 20–25 minutes.
- Use the wrinkle check to test the setting point then, when ready, take off the heat and skim off any scum from the surface.
- While hot, stir in the Pimm’s and leave for a few minutes so that the alcohol burns off.
- Ladle into warm, dry sterilize jars and seal.
- Keeps for up to 6 months unopened. Once opened, refrigerate and consume within 4 weeks.
|
5. Chocolate Fruit Pizza

| Ingredients:
Filling:
Fruit topping:
- Strawberries, Kiwi, Clementines, Berries or any fruit or your choice, all chopped.
|
Method:
- First up make the base by blitzing the almonds in a food processor until they have broken down into a fine consistency, almost like almond flour. Add the dates, melted coconut oil, cocoa powder and vanilla extract and continue to blitz until the dates have been finely chopped and everything is well combined.
- Press the mixture into a springform tin or tart dish and place in the fridge for an hour to set. If you don’t have much time then you can put it in the freezer for 15 – 20 minutes.
- Make the filling by mixing the cream cheese, Greek yoghurt, orange juice and zest and vanilla extract together in a bowl. Now spread this mixture on the top of the pizza base and then decorate with the fruit topping of your choice.
- Serve immediately or store in the fridge for a couple of hours until you are ready to eat it!
|
6. Strawberry Granola Frozen Yoghurt Bites

*Recipe sourced from Eats Are Amazing
Ingredients:
- 200g strawberry yoghurt
- 50g Granola
- 6 large fresh strawberries
|
-
Gather together your ingredients. Lay out approximately 12 cupcake cases or silicone muffin cups on a small baking sheet or tray (this will need to fit in your freezer so it may be worth checking it for size before you start).
-
Sprinkle a thin layer of granola over the bottom of each cake case. Using a spoon, dollop some yoghurt on top of the granola in each cake case until all the yoghurt has gone. Spread the yoghurt around with the spoon to ensure it completely covers the granola.
-
Hull each strawberry and cut it in half, then use the halves to top each cake case, pressing them down into the with the tip of your finger.
-
Place the cups (still on the baking tray) into the freezer and leave to freeze for a couple of hours until set solid.
-
Once frozen through, remove from the cases and serve (or bag up and pop straight back in the freezer to eat later).
|
7. Strawberry Shortcake Overnight Oats