Description
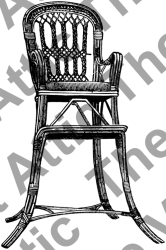
The Velvet Attic Water Decal / Transfer for wooden furniture, boxes & home decor! Vintage High Chair Use our exclusive water decals / transfer designs for all your acrylic and chalk paint projects. An easy, exciting technique for transferring a print or an image onto hard wooden surfaces. All you need is sharp scissors, a tray of water, damp cloth, paper towel and our Velvet Attic Vintage Paper Glue. The decal has a transparent background so will pick up the colour you have used on your wooden item. Lighter & pastel colours work better than dark colours. Approximate Size: A6Please see picture for detail.On ordering, you will receive a high quality 300dpi print of the advert below as well as a FREE small sample of one of our decals for you to practice with before the real job! See below for step by step instructions.
Please note colour could show up slightly different depending on the settings of your monitor. Instructions:Paint your surface and finish all techniques (distressing, antiquing, etc). Allow to dry and paint 1 layer of
Velvet Attic Vintage Varnish (Matte, Satin or Gloss) to avoid stains and water marks while applying your decal.Have ready your decal and a flat tray that your transfer will fit into. Sharp scissors, damp cloth, paper towel and Vintage Paper Glue.
Step 1Using your sharp scissors, start cutting out the pattern or writing on your decal. Cut as close as possible without cutting into the printing. This will ensure that you do not see vast clear plastic on the surface of your wooden item as it will be visible at a certain angle once dried, varnished or waxed. The more effort you put into cutting your print out, the more authentic your print will be. Place your pieces on your surface and make a mental note of how you would like them positioned.
Step 2Fill your flat tray with warm water (not hot).
Step 3Work with one piece at a time. Put your first cutout piece into the water and wait +- 30-60 seconds. Ensure the whole piece is under the water. It should start to curl. You can feel the decal slide from the paper. Don't leave it in the water too long or it will completely separate from the paper.
Step 4Before you start, cover the surface area with
Vintage Paper Glue. Slide the decal off roughly half way, position as required and then gently pressing the decal to the surface pull the layer of paper out from underneath. Fold your piece of paper and using the smooth side begin smoothing the surface of your decal pushing out the excess water and glue. You need to remove as much water and glue between your surface and the decal as possible. After that blot dry your surface with a paper towel.Repeat the same steps for the rest of your pieces for your
